Educator Onboarding
LEO Art Challenge Workshop
Satellite Tracking, Orbits, and Modeling
Workshop: Satellite Tracking, Orbits, and Modeling
Workshop: Trek-a-Sat
Workshop: Yerkes
Workshop: Electrostatics in Space - Carthage- Yerkes
Workshop: Life in Space! BTCI
Workshop: More Than a Rainbow - Yerkes
Workshop: Small Steps Teachimg Space Brings Giant Steps in Classrooms-SEEC
Workshop: 2017-01-28 Yerkes
Tools You Might Use
Educational Learning
Standards
Documentation
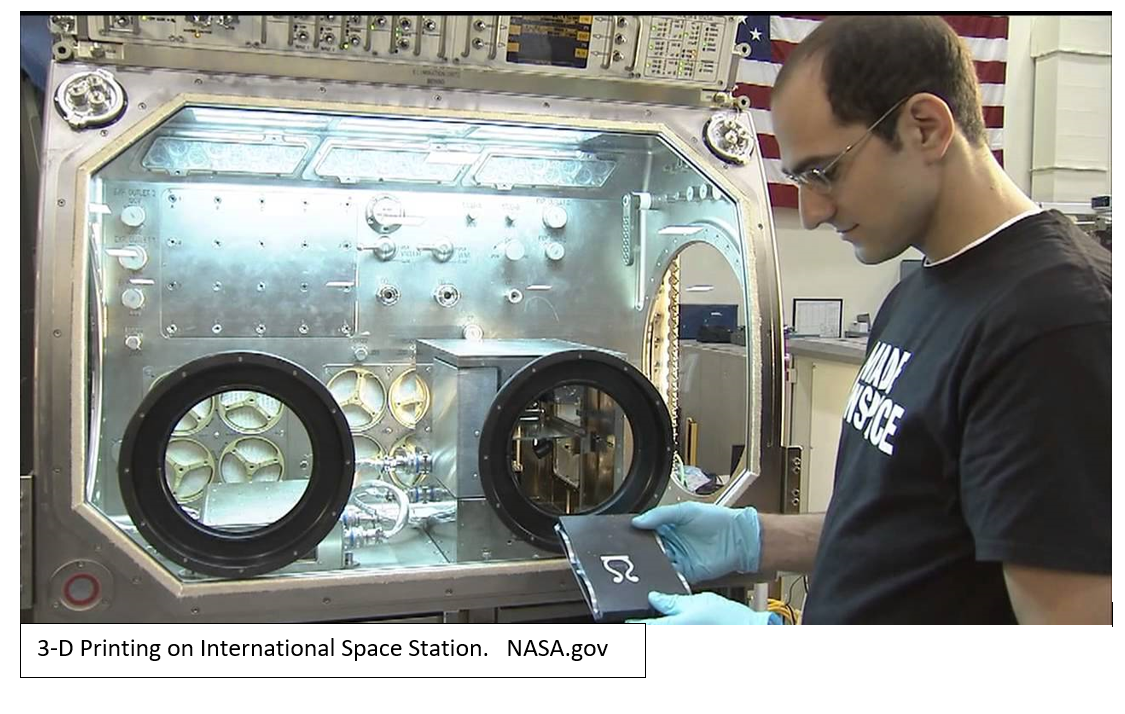
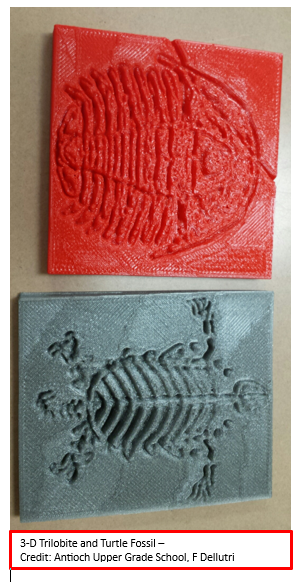
3-D Printing
トピックアウトライン
-
-
 Title: 3-D Printing (Updated August 2023)
Authors: Frances Dellutri, Kevin Fogelson
Ages: 10+
Summary: The basics of how a 3-D printer works and an introduction of the basic skills needed to produce a design for 3-D printing. Software options are given for the students to aid their comfort level while learning new skills.
Topics Covered: 2-D, 3-D, 4-D, graph plotting, changing variables, positive and negative space, textures, colors, wire frame, slicer, model design, basics of 3-D printing
Pre-requisites: Computer or electronic device, internet connection and the ability to download modeling software, a computer mouse is helpful
For printing your files: Take a look at the following article: 3-D Printers Near Me
Learning Standards:
3D printing technology is a powerful learning tool that can involve students of all ages in active learning, design thinking, and problem solving across the learning disciplines. It creates opportunities for integrating science, engineering, technology and mathematics with other disciplines. The following article outlines the connection of 3-D printing with the US NGSS (Next Generation Science Standards) and the CCSSI (Common Core State Standards Initiative).
The SpacEdge goal is to provide teachers with:
• A solid foundation to learn and teach 3D printing
• Ideas for bringing 3D printing into your classroom
• Knowledge about a type of 3D modeling software
• Foundational projects that make it easy to integrate 3D printing into your curriculum
• Confidence to take projects further and tailor them to your students’ needs
The SpacEdge
 goal is to help students:
• Increase their planning, critical thinking, reasoning, and creative skills
• Develop strong communication and collaboration skills
• Practice visualization and decision making
• Know how and when to use this technology and how to choose appropriate tools
• Learn the importance of iteration in the design cycle
• Understand how to use a 3D printer
-
SpacEdge suggests that students take a Pre-Lesson and a Post-Lesson Survey prior to teaching the 3-D course and viewing the brief video below. The identical Student Post-Lesson Survey appears in Section 8 of this lesson and will be a good indicator of subject matter misconception mindset correction and student mastery of the subject matter.
Here is a brief overview (2 min) of what 3-D printing is all about by Mashable. 3-D printing is changing how we produce things from tools, toys, food, and even human body parts. The technology will be essential to those living beyond Earth. Take a look:
-
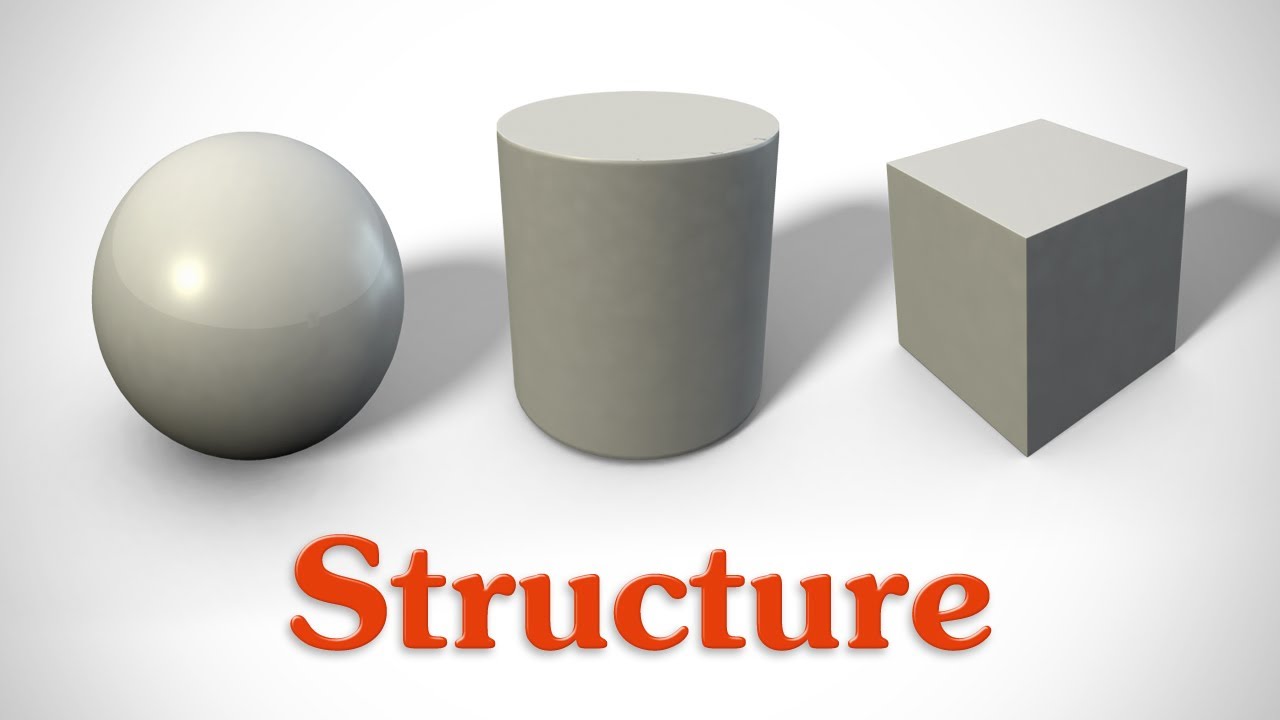
2-D vs 3-D (graphics) - to envision the realm of 3-D space on a computer.
A mouse may be helpful to work with 2-D and 3-D websites.These exercises will help to make the knowledge bridge from 2D to 3D images and design.
a. x-y axis vs. x-y-z axes
i. Use: Goeogebra Graphing Tool: Geogebra.org
ii. Click on Classics
iii. Select “Learn Geogebra Classic” and follow the instructions to see how to manipulate a point in a 2-Dimensional graph.
b. Try this fun activity to plot 2-D -
Allow your creativity to come and up with an image (turtle, fish, house)
i. Provide a table of the data points for x and y and then
ii. Plot these points to show their graphic.
Here's a quick knowledge check: Watch to see what happens
i. if you add more plots.
ii. if you add =5 to each x-value in your plot data.
iii. if you add -5 to each y-value in your plot data.
******
c. Now take a look at a 3-D plot.
On the website below, move your cursor across the shape on the screen to understand the x, y, and z perspectives.
https://academo.org/demos/3d-surface-plotter/
Time for another knowledge check: Watch to see what happens
i.Now Change the range of x- axis values and observe what happens to your graphic.
ii.Try changing the range of y-axis values and observe the changes to your graphic.
iii.The z-axis information gives you a formula, change the formula and see what happens to the shape of the form.
******d. Add variables into a pre-set equation and then graph change
i. K3DSurf: http://k3dsurf.sourceforge.net
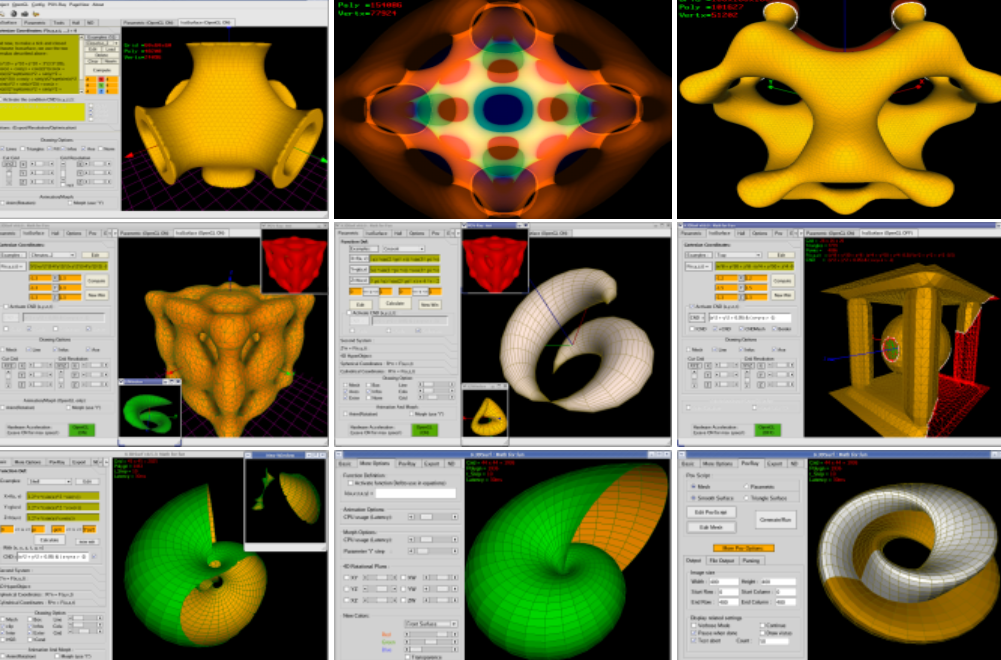
Download the free website: (carries the name MathMod 11.1)
SourceForge.net: http://sourceforge.net/project/showfiles.php?group_id=142839
Choose the 'Blackhole' Shape and experiment with the options to see what happens with the shape. Go to the domain (ranges) and notice what happens with the shape as you change the ranges of the domains for the 3 axes x,y, and z.
To reset, exit the program and re-enter. To Zoom in and out, hold the right side of the mouse and drag forward or backwards.
Have fun!
e. Animation of a 3-D image into 4-D
The boundary of the 120-cell is composed of 120 dodecahedral cells with 4 meeting at each vertex. It can be thought of as the 4-dimensional analog of the regular dodecahedron. This is a free interactive program that allows you to explore a number of symmetries of the 120-cell. You can also animate 4D rotations to give a sense of the amazing structure of this polytope.
In elementary geometry, a polytope is a geometric object with "flat" sides. It is a generalization in any number of dimensions of the three-dimensional polyhedron.
i. Magic 120-Cell: http://www.gravitation3d.com/120cell
Needs “.NET framework 2.0” for installing
Increase your skills with 3-D design with these educational websites that explore the fundamentals of 3D shapes on a Windows PC
(Best with Chrome internet browser)
a. Meshmixer: http://www.meshmixer.com
Tutorial for Meshmixer:
b. ScuptGL: https://stephaneginier.com/sculptgl/
Tutorials are found on Youtube:
c. EditSDF: https://stephaneginier.com/archive/editSDF/
d. SuperShapes: http://andrewmarsh.com/apps/staging/supershapes.html
e. 3D Slash: https://www.3dslash.net/index.php
Educational software that explores the fundamentals of 3D shapes on a Windows PC:
a. K3DSurfL: http://k3dsurf.sourceforge.net
b. Magic 120-Cell: http://www.gravitation3d.com/120cell
Needs “ .NET framework 2.0” for installing
********
f. Understanding geometric and organic shapes-
Shapes fall into two categories: geometric and organic shapes. Organic shapes can be considered as being made up of geometric shapes.
 Watch the following 3 min video to understand geometric and organic shapes.
https://thevirtualinstructor.com/Shape.html
g. Understanding positive and negative shapes-
In 2-D images, positive and negative shapes can add foreground and background. According to the Westminster Library,
(https://westminsterschools.libguides.com/c.php?g=265404&p=1789592)
- Positive shape is the totality of the mass lying between its contours; in three-dimensional work, the visible shape or outer limit of a form changes as the viewer's position is changed. These outer limits are seen as shapes moving back and forth between major contours.
- Negative space is empty space defined by a positive shape. Sometimes referred to as occupied and unoccupied space.
Check out the article on positive and negative shapes in 2-D art https://kidcourses.com/positive-and-negative-space-art-projects/

and take a hand at creating a Notan:
Supplies: 1 medium sized dark paper ( 4 in x 4 in or 10 cm x 10 cm )
1 larger white paper 9 in x 11 in or 28 cm x 23 cm)
1 colored pencil to show on the dark paper
Scissors
Glue or glue stick
SculptGL Part 1 How to create chairs and tables: (creating positve and negative shapes) This video will help you understand how to add and subtract shapes.
SculptGL Tutorial for beginners Part 2 - How to make a Cage:
Wireframes are important to understand volume and the space inside a 3-D shape. Wireframe perspectives are helpful when deciding if you want positive or negative spaces in your model. Most printers print with plastics, which are very light, prints can be made with metals in some printers. It will be important to understand how a 'hollowness' or 'negative space' may save money, the weight of an object, or allow functions for the object that would not be available, if the object were solid.
Work with a wireframe with a shape to understand creating positive and negative spaces:
a. SuperShape: http://supershape.ahoi.in/
-
Use of iPad and other personal devices to further investigate 3D space and design
a. Morphi
https://apps.apple.com/us/app/morphi-3d-modeling-design/id833530351
b. Sculptura
https://apps.apple.com/us/app/sculptura/id1321221385
c. HD Potteryhttp://www.idreams.pl/en/our-products/show/product/
-
You will see in your 3-D desgning and printing the use of OBJ and STL files. here is a bit of an explanation about their difference. The resource is Long Live the OBJ
OBJs, sometimes referred to as a wavefront or object file, are very similar to STL files. In fact, structurally they’re virtually identical, meaning that an OBJ and an STL mesh of the same point cloud have the same geometry. A point cloud is a set of data points in space. The points may represent a 3D shape or object. Each point position has its set of Cartesian (w,y, and z) coordinates. Point clouds are generally produced by 3D scanners or by photogrammetry software, which measure many points on the external surfaces of objects around themThat’s because both OBJ’s and STL’s take the surface map laid out by a point cloud and create a solid surface by meshing the points together with polys– a.k.a. polygons; a.k.a. triangles made by connecting the neighbouring points in a point cloud, a.k.a. this:
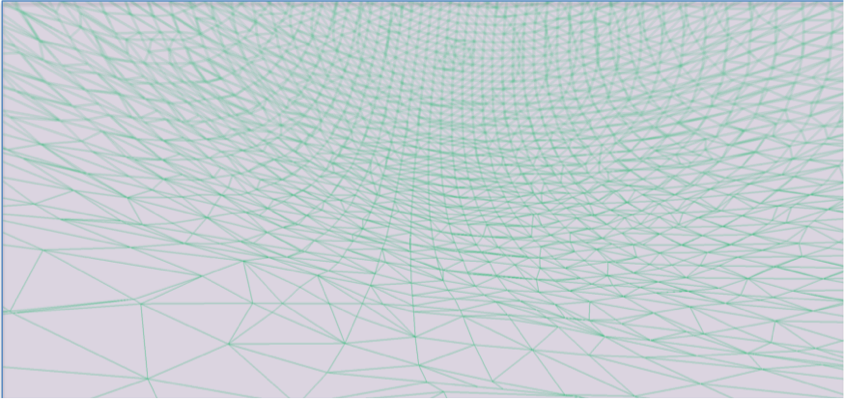
(BOTH OBJ AND STL MESHES HAVE THE SAME UNDERLYING STRUCTURE OF POLYGONS)
OBJ vs. STL
(AN OBJ ON THE LEFT AND AN STL ON THE RIGHT; STRUCTURALLY THE SAME BUT WITH DIFFERENT SURFACE DETAILS)
The big difference between STL and OBJ meshes is what’s displayed on the surface. STL files don’t display any data on the surface of the mesh. They indicate only the surface itself– the geometry of the object, how big it is and the shape of its sides, but that’s about it. That’s why STLs are greyscale by default, because there is no color or texture data.
OBJ files, on the other hand, incorporate the actual photographic imagery captured by the camera while you’re scanning and map it onto the surface of the polygons contained in the mesh.
How?
That camera between your scanner’s two lasers, that’s how. When you scan the lasers fire and the scanner’s camera captures an image of the laser line when it hits the surface of your object. The scanner takes a photograph for every incremental rotation of the bed. STL files take the 3D coordinates of the point cloud and mesh using only that data. But the OBJ mesh goes one step further and take the photographs as well. Which brings me to…
The all mighty texture map:

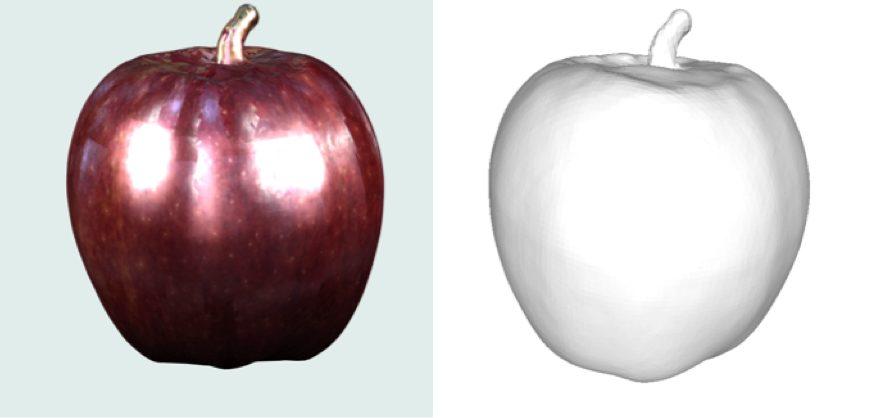
(A TEXTURE MAP OF AN APPLE)
From now on, when you save your point cloud, you might notice that the file type has changed from .MFC to MFCX. That’s because we’ve changed them to include not only data points but the texture map too.
A texture map is all of the photos captured during scanning combined and broken down into polygons. When you open up your OBJ file you’ll notice that it’s accompanied by a .PNG file; that’s your texture map. They’re actually kind of stunning, albeit not very easy to use for a human.
When you export to an OBJ, the software takes the texture map and wraps it around the surface of the mesh, matching the poly’s in the texture map to the ones made with the point cloud. The result is a dramatically realistic 3D model that has full color and detail.
-
 These programs are critical to the development of 3D design and printing
 TinkerCad (best with Chrome internet browser)
b. Pixologic Sculptris
These are slicer programs that will aide in setting up your 3D design for your 3D printer:
a. Simplify3D
b. Cura
https://ultimaker.com/software/ultimaker-cura
This 3D printer has been the most efficient and cost-effective for making successful 3D prints
a. Dremel 3D45
https://digilab.dremel.com/products
b. Dremel PLA Plastic Filament
https://www.amazon.com/Dremel-Printer-Filament-Diameter-Weight/dp/B00NAQPW5Y
-
To learn about 3-D printer accessibility options, consult the following article:
 Here are the steps to prepare your file for printing:
Transferring your 3-D design from Tinkercad to Simplify3D
i. Export your TinkerCad design to a flash drive
ii. Export your design as a specific file
1. STL will only print one color (Dremel 3D45 printer)
2. OBJ will keep all your colors (3D printers that print more than one color)
Open your splicer program (Simplify3D or Cura)
i. Use the correct 3-D printer settings to make a successful print
Troubleshooting issues and tips with the 3-D printer. Tips and Tricks with 3-D Printing gives a helpful tip sheet.
-
 Time and space continuum !
Find the website that allows you to look at galaxies and find how far away they are and how far back in time they are.
Link Topic 3.e ‘Animation of 3-D into 4-D) here
Einstein’s theory of space/time ( simple discussion)
-
Create a pre-survey to gather students' knowledge and skills before the implementation of 3D design. Continue to gather student feedback by creating a Google Form with questions and polls to see what worked and what needs to be tweaked in instruction and implementation. Create an exit survey to see if students understood main 3D design concepts. Concepts that students must know: 1. Do students understand the difference between the x, y, z axis? 2. Can students explain how a 3D design is printed on a 3D printer? 3. Do students know the difference between an STL file and an OBJ file? 4. Can students tell the difference between a geometric 3D design and organic 3D design? 5. Do students know how to add texture and detail to designs? 6. Do students understand proportion and why it is extremely important to their design? 7. Can students demonstrate complex shapes in their design?
-
We hope the activities in the '3D Printing' Lesson have been helpful to you.
It would be very advantageous for the teachers in the SpacEdge Academy to
receive feedback from your use of the information offered in the SpacEdge Academy.
Please take a moment to give us your ideas about this course and if you would like to
become a lesson contributor in the Academy, please contact us at spacedge.academy@gmail.com . -
Send a Postcard to Space through NSS Supported Blue Origin Club For The Future initiative!
Visit: SpacEdge Academy Postcards in Space Course